Order Labels Setup
If you use a QL-800 or QL-810W printer, please turn off the printer "Editor Lite" light. You must also Reboot Clover POS one time after connecting the QL-800 series printer to its USB port.
QL-800 printer is incompatible with Clover Flex and Clover Mobile because these devices do not have USB ports.
Once you get the printer, simply connect it to Clover Station's USB port with the USB cable packaged with the printer, and install one of the following 10 types of labels:
If you use Clover Mobile/Flex, you can connect the printer to Clover Mobile/Flex through Wifi Connection. First connect the printer to the network through Wifi, then open the settings page by clicking on the "Settings" menu item.

Check "Connect Printer to Clover by Wifi."

By enabling this option, the app will search for the printer in your wireless network and configure it automatically.

Connect Brother QL-720NW/QL-800/QL-810W/QL-820NWB
If you use a Brother QL-720NW//QL-800/QL-810W/QL-820NWB printer, please open the settings page by clicking on the "Settings" menu item.

Tap on the "Printer Model" option to select the correct printer model:

Auto Cut Label
Once you get the printer, simply connect it to Clover Station's USB port with the USB cable packaged with the printer, and install one of the following 10 types of labels:
- DK-1204 (0.66" x 2.1" or 17 mm x 54 mm)
- DK-1209 (1.1" x 2.4" or 29 mm x 62 mm)
- DK-1201 (1.1" x 3.5" or 29 mm x 90 mm)
- DK-1208 (1.4" x 3.5" or 38 mm x 90 mm)
- DK-1202 (2.4" x 3.9" or 62 mm x 100 mm)
- DK-2113 (2.4" x 50' or 62mm x 15.2m) Clear Film Tape
- DK-2210 (1.1" or 29mm) Tape
- DK-2205 (2.4" x 50' or 62mm x 15.2m) Tape
- DK-2211 (1.1" or 29mm) White Film Tape
- DK-2212 (2.4" x 50' or 62mm x 15.2m) White Film Tape
- DK-2251 (2.4" x 100' or 62mm x 30.4m) Black/Red on White Tape (QL-800 series printers only)
Connect Printer by WiFi
If you use Clover Mobile/Flex, you can connect the printer to Clover Mobile/Flex through Wifi Connection. First connect the printer to the network through Wifi, then open the settings page by clicking on the "Settings" menu item.
Check "Connect Printer to Clover by Wifi."
By enabling this option, the app will search for the printer in your wireless network and configure it automatically.
Connect Brother QL-720NW/QL-800/QL-810W/QL-820NWB
If you use a Brother QL-720NW//QL-800/QL-810W/QL-820NWB printer, please open the settings page by clicking on the "Settings" menu item.
Tap on the "Printer Model" option to select the correct printer model:
Auto Cut Label
If you want to cut each label automatically, please enable the "Auto Cut Label" option as below:

- Open Menu and select "Settings."
- Check "Auto Cut Label" and click "Done."
Printing Setup
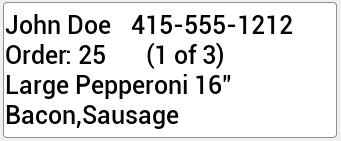
Order Labels app can print labels for order line items. The label includes customer name, phone number, item name, modifiers, and order number. the label can be placed on containers such as Coffee cups or Pizza boxes.
In order to enable Order label printing, you will first ensure the printer is connected and the correct label size option is saved.


In order to enable Order label printing, you will first ensure the printer is connected and the correct label size option is saved.
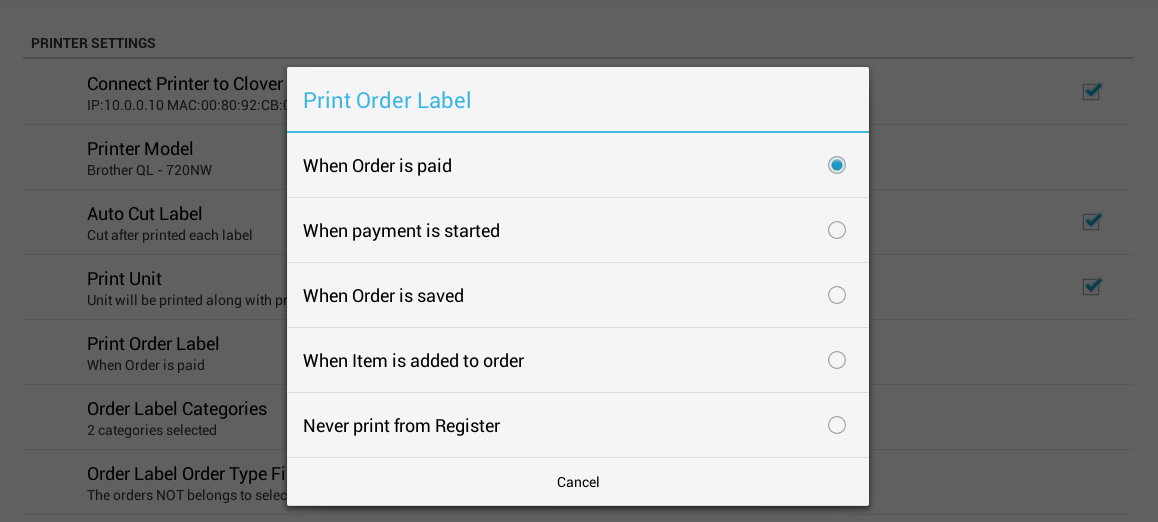
- Go to the Print Order Label setting on the Settings page to choose when to print Order Labels.
- You can choose to print an Order Label when an order is paid, saved, or completed, an item is added to an order, payment is started (Pay button is hit), or never. The default setting is "When order is paid."
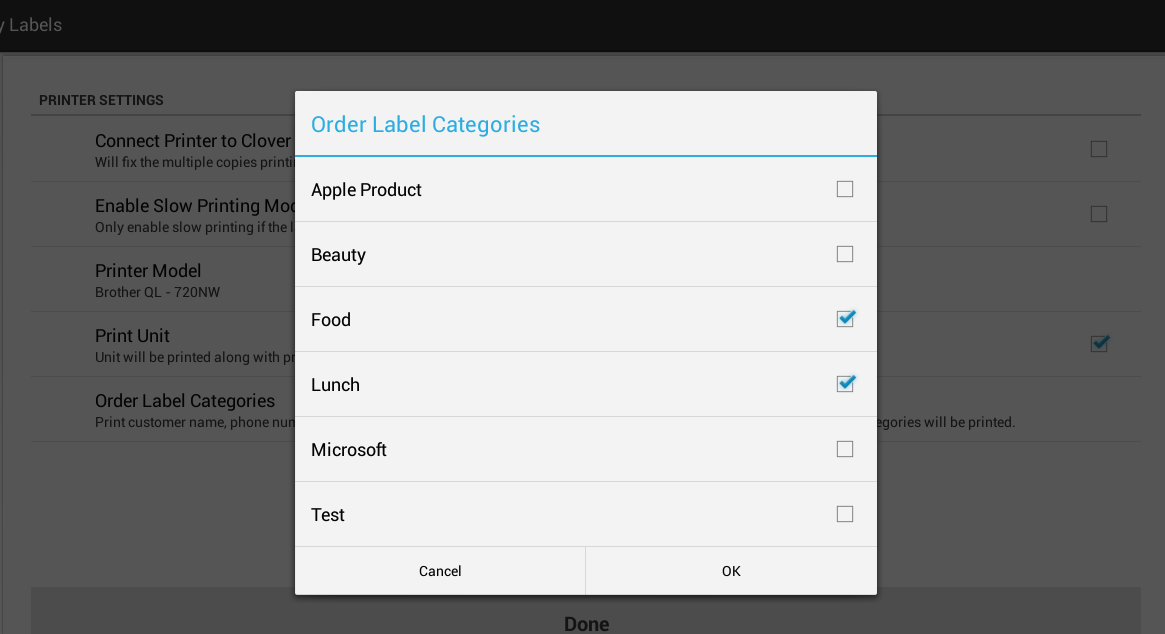
- Then go to Order Label Categories on the Settings page to select the categories for items to print.
- By default, "All Items" is selected, such that a label will be printed for all items in the order. If you don't want to print all items, please unselect "All Items."
- Select the categories that you want to print labels for and save. For example, as in the example below, only items belonging to "Food" or "Lunch" categories will be have order labels printed. If no category is selected, then no order labels will print.
- Now once an order is paid, saved, or an item is added, a label for any "Lunch" or "Food" order items will be printed automatically as demonstrated below.
- If you enter customer information to an order as notes, you can enable the "Use Order Notes as Customer Information" option, and order notes will be printed as customer information on the label.
- If you want to print an item's alternate name rather than the item's name, you can enable the "Use Alternate Name" option, and the item's alternate name will be printed as item name on the label.
- To prevent fraud, you can choose to permit only Admin or Manager users to reprint labels by enabling the "Require Manager's Approval to Reprint" option. Reprinting will require a manager passcode. When this option is enabled on Clover Station one, Mini (1st generation), or Mobile, you must login as Manager or Admin to reprint.
- If you only want Admin or Manager users to change the label design or printer settings, you can enable the "Lock Settings and Design" option.

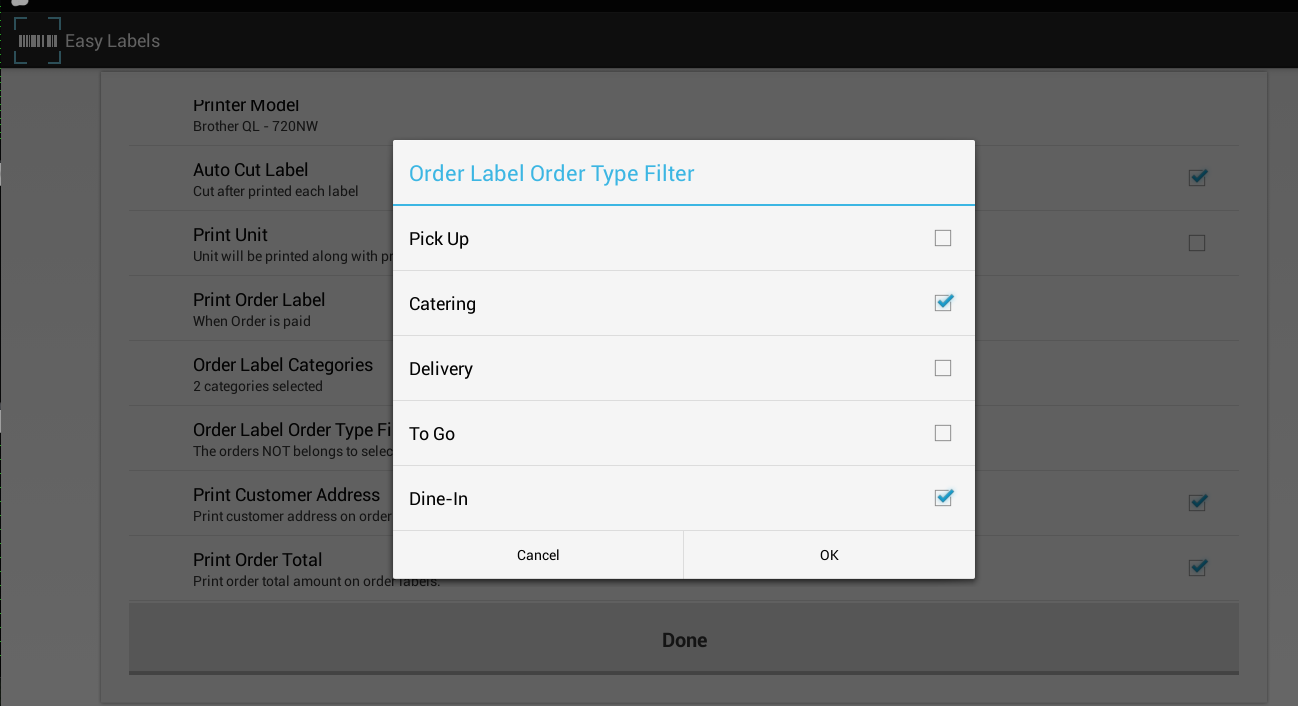
- If you do NOT want to print labels for certain type of orders, please go to the "Don't Print Order Label for Selected Order Types" selections on the Settings page and select the order type(s) that you do not want to print labels for. Only order types that are not selected in the settings page will have labels printed. If you want to print labels for all order types, then do not select any order type here.
- Use one of the following label sizes to print order labels:
- DK-1204 (0.66" x 2.1" or 17 mm x 54 mm)
- DK-1209 (1.1" x 2.4" or 29 mm x 62 mm) - up to 2 lines of modifiers
- DK-1201 (1.1" x 3.5" or 29 mm x 90 mm) - up to 2 lines of modifiers
- DK-1208 (1.4" x 3.5" or 38 mm x 90 mm) - up to 2 lines of modifiers, support address
- DK-1202 (2.4" x 3.9" or 62 mm x 100 mm) - up to 2 lines of modifiers, support address