Stock App Tutorial
Stock app decrements stock count when an item is added to an Order. If you remove the item or delete the order, it will be added back to stock.
Setup
If you have already set up stock quantity and cost in Clover Inventory app, you can import them to Stock app and set up the initial purchase order in Stock app.
- Log in to Stock Web, go to Import Stock from Clover page
- Load data from Clover; if you have lot of items, they will take a while to load.
- Review the stock counts imported from Clover.
- Enter an order number, click Save.

ONLY IMPORT FROM CLOVER ONCE! For future new inventory, please enter items as purchase orders. If for some reason you want to import stock count from Clover again, please see Reconcile from Import Clover Stock Count on the "Stock Reconciliation" page.
Stock app disables the Update item counts after each sale in Inventory app to avoid the stock count update by both Inventory and Stock apps. If you are not ready to turn over Stock management to Stock app and still want to use Inventory app to track the stock count, you should go to the Inventory set up page to Enable the "Update item counts after each sale" option.
Manage Purchase Orders
There are three ways to add purchase orders:
- Enter Purchase Order / Invoice allows you to enter an existing purchase order or invoice to add stock the system.
- Import PO Data From CSV File helps you to enter a purchase order or invoice with a large number of items.
- Create Purchase Order allows you to create new a purchase order and send to your vendor.

When you receive shipments for "On Order" purchase order, you can mark these items as received so that they can be moved to stock. To mark items as received, go to the Edit Order page. If the entire order is received, select 'Mark All Received" to mark all items as received:

If only partial order is received, you can then use "Mark as Received" button next to each of the received items:
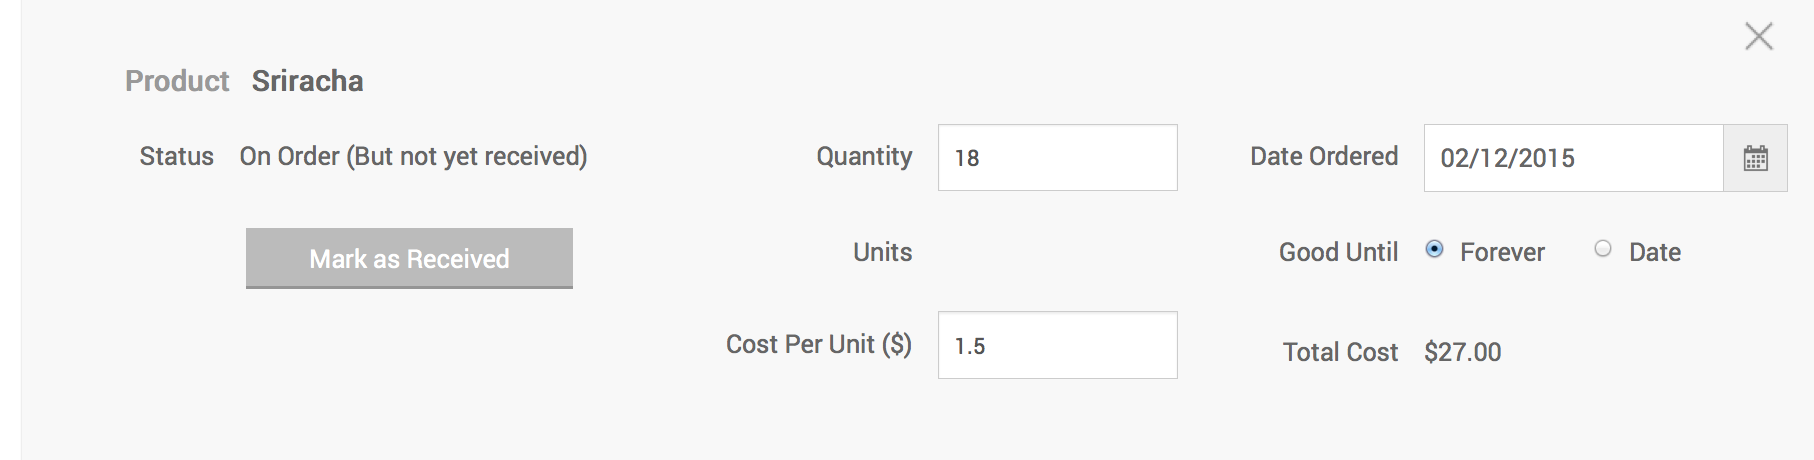
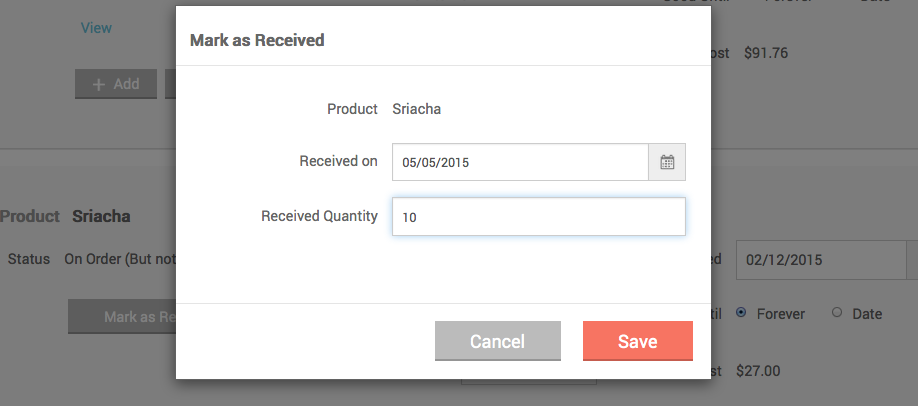
If only partial quantity of an item is received, you can enter received quantity in the "Mark as Received" dialog; the system will only move the correct quantity of item to stock and leave remainder as "Not yet received'.
In the following example, only 10 of 18 Sriacha was received, thus 10 Sriacha will be made available for sale and a new item of 8 Sriacha will be added to this Purchase Order as "Not Yet Received".
Sometimes when receiving new products, you don't have time to enter the PO to the system but want to move the product to shelf and start selling first. This app provides a "Negative Stock Count" feature that allows you to enter purchase order later. You need to enable this feature by selecting "Allow negative count" on the Settings page.

Stock Level as reorder threshold
You may set 2 stock level values for each product, min and max, in Stock app. Then you can see all products that on hand counts are below min stock level on the products page with the "level than stock level" filter. Select these products to create a "re-order" PO.
In the new "re-order" PO, the default order quantity for each product is calculated based on current On Hand count and max stock level (order guide). For example, if max level is set to 10 and current on hand count is 2, then default order quantity will be set to 8.
Lock Purchase Order
You may lock a received purchase order so that nobody (or only admin) can change received quantity and unit cost by editing the PO.

Make Sold Out Item unavailable for sale
You may make an item unavailable for sale once it is sold out. Enable the option below in the Settings page:

Manage price by fixed margin
You may set up a margin % for each product in Stock app and use it to control the selling price based on the cost from Purchase Orders. Whenever you enter received PO or mark "on order" PO as received, Stock will calculate the price of the products in PO from the unit cost:
price = unit_cost x 100 / (100 - margin)
The price will be rounded to the nearest .99 or .49.
and automatically update the price in Clover Inventory app or receive price change reminder alert messages through Ping Me If app.
For VARIABLY priced products, you can use margin to track their cost. The cost will be calculated as below:
cost = price * (100 - margin) / 100.
If you'd like to receive an alert when stock level goes low, you can set up Stock count email alerts with Ping Me If app. Please make sure choose "Stock App User" subscription to receive a discount for Stock app users:

You can also use Stock Level alert to receive alerts when the stock count goes below the min stock level.
You can set up access permission for employees and managers in the Settings page:

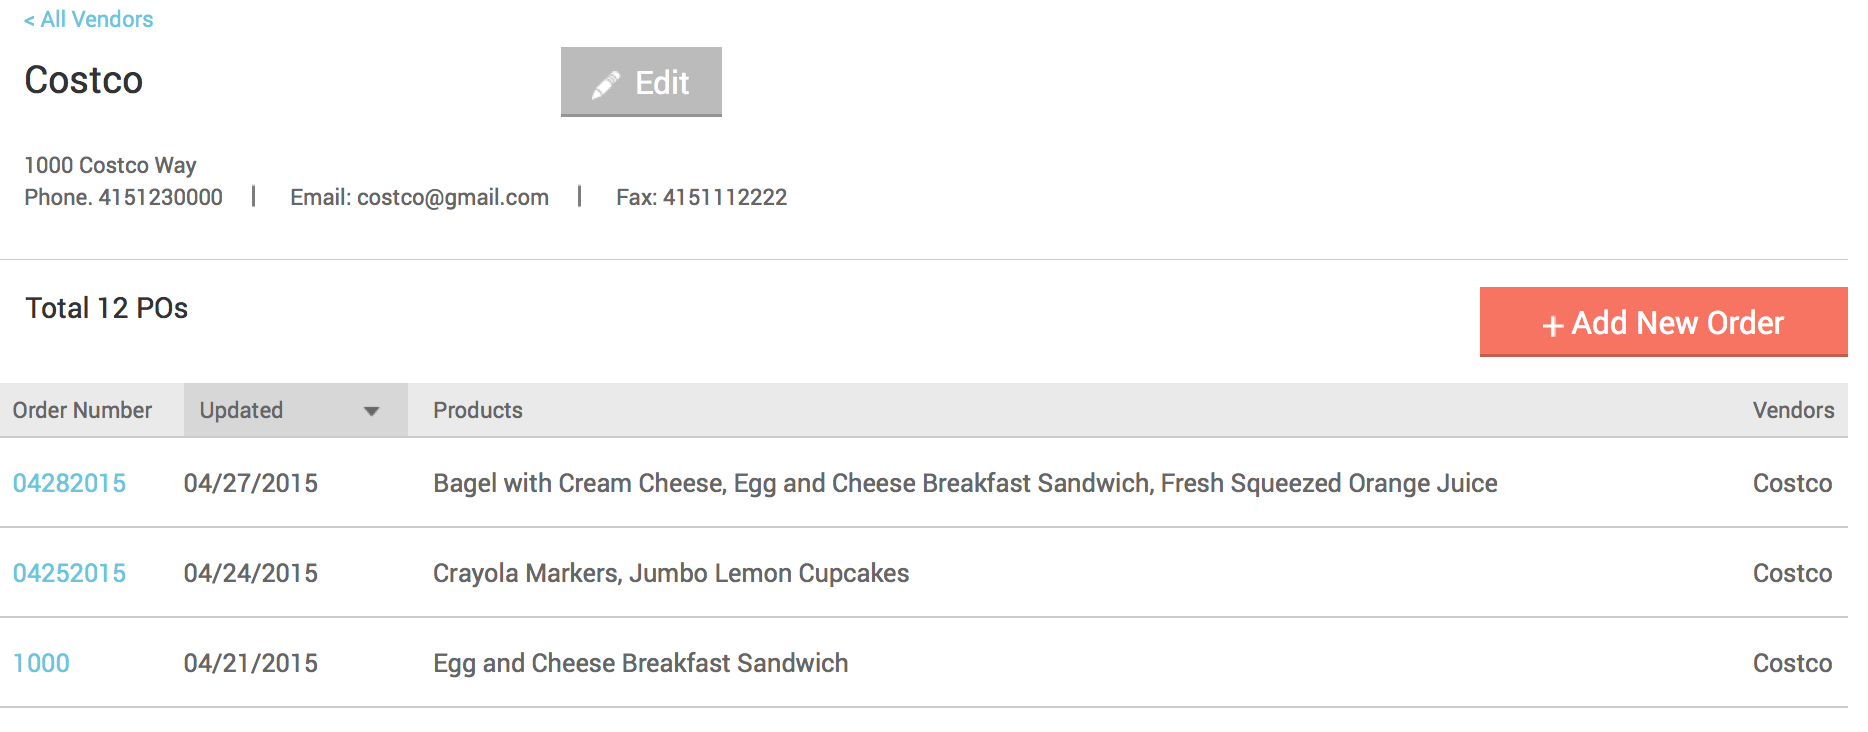
You can manage all your vendors from the Vendors page, including vendor's contact information and purchase order history from the vendor:
You can also assign a Default Vendor to each product so that you can view products by default vendor and track sales by default vendor.
In order to track stock shrinkage, you can record the shrinkage as a Purchase Order adjustment. You can use "Adjustments" report to view all adjustments. An adjustment can be recorded through the following steps:
This app provides a "Stock Reconciliation" feature that helps you count the stock in your store and adjust the difference.
This app provides a "Return item back to Stock" feature that allows you to add a returned item(s) back to Stock as an adjustment.
This app provides Product Kits and Modifiers features that help you track food or drink cost by ingredients.
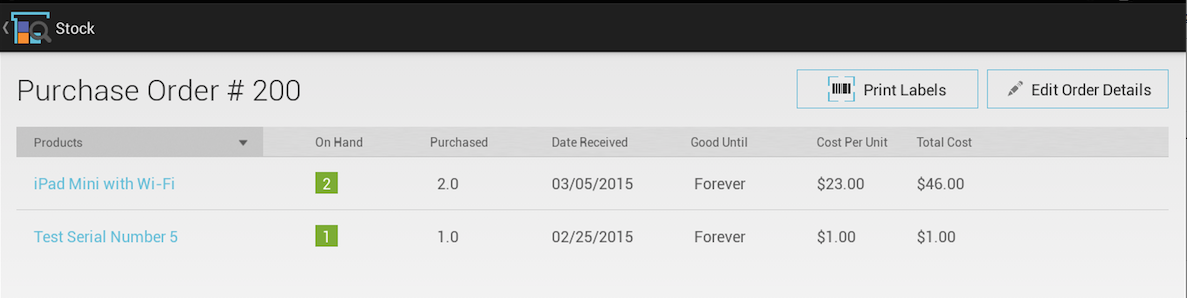
To use Easy Labels App to print bar code labels, select the "Print Labels" button on the Purchase Order page. This will print labels for all received items in the purchase order. These items will be selected along with their purchased quantity in Easy Labels; all you need to do is click the "Print" button.
This app provides 12 types of reports in CSV format for Admin users:

When you have multiple stores using Clover and these stores are connected through Multi Store Reporting app, you can check the product availability at other stores on Clover device.
Just simply select the "Availability At Other Stores" tab on the Product's detail page. The app will display the on hand counts from other stores for the product. Products between stores are matched by product name.
Transfer Stock to Other Store
When you have multiple stores using Clover and these stores are connected through Multi Store Reporting app, you can transfer products between stores using the Stock Transfer feature.
When products are transferred from Store A to Store B, the stock count for these products in Store A will be adjusted with the reason "Transferred out of the store." A new "on order" Purchase order will be added to Store B with these products. Then once Store B receives the products, they can simply mark the purchase order as received and move the products into stock.
You may also send a transfer request to another store with a list of products that you'd like to be transferred from the other store.
You may set up a margin % for each product in Stock app and use it to control the selling price based on the cost from Purchase Orders. Whenever you enter received PO or mark "on order" PO as received, Stock will calculate the price of the products in PO from the unit cost:
price = unit_cost x 100 / (100 - margin)
The price will be rounded to the nearest .99 or .49.
and automatically update the price in Clover Inventory app or receive price change reminder alert messages through Ping Me If app.
For VARIABLY priced products, you can use margin to track their cost. The cost will be calculated as below:
cost = price * (100 - margin) / 100.
Non Stock Item
You may mark any product as "Non Stock" so that Stock app will stop tracking its stock count. Then Stock app will not deduct the product's stock count when the product is sold.
Stock Count Alert
If you'd like to receive an alert when stock level goes low, you can set up Stock count email alerts with Ping Me If app. Please make sure choose "Stock App User" subscription to receive a discount for Stock app users:
You can also use Stock Level alert to receive alerts when the stock count goes below the min stock level.
Permissions
You can set up access permission for employees and managers in the Settings page:
Vendors
You can manage all your vendors from the Vendors page, including vendor's contact information and purchase order history from the vendor:
You can also assign a Default Vendor to each product so that you can view products by default vendor and track sales by default vendor.
Record Shrinkage
In order to track stock shrinkage, you can record the shrinkage as a Purchase Order adjustment. You can use "Adjustments" report to view all adjustments. An adjustment can be recorded through the following steps:
- Find that product in the Products page, select the product name to go to product detail page.
-
On the Purchase Order History tab, select the order that you'd like to
apply the adjustment to, then click the "Edit" button next to the order.
- Use "Add" or "Remove" to open the adjustment dialog, enter the quantity you want to adjust, select a reason, optionally enter some notes, then click "Save".
Stock Reconciliation
This app provides a "Stock Reconciliation" feature that helps you count the stock in your store and adjust the difference.
Handles Returns
This app provides a "Return item back to Stock" feature that allows you to add a returned item(s) back to Stock as an adjustment.
Track Food or Mixed Drink Cost
This app provides Product Kits and Modifiers features that help you track food or drink cost by ingredients.
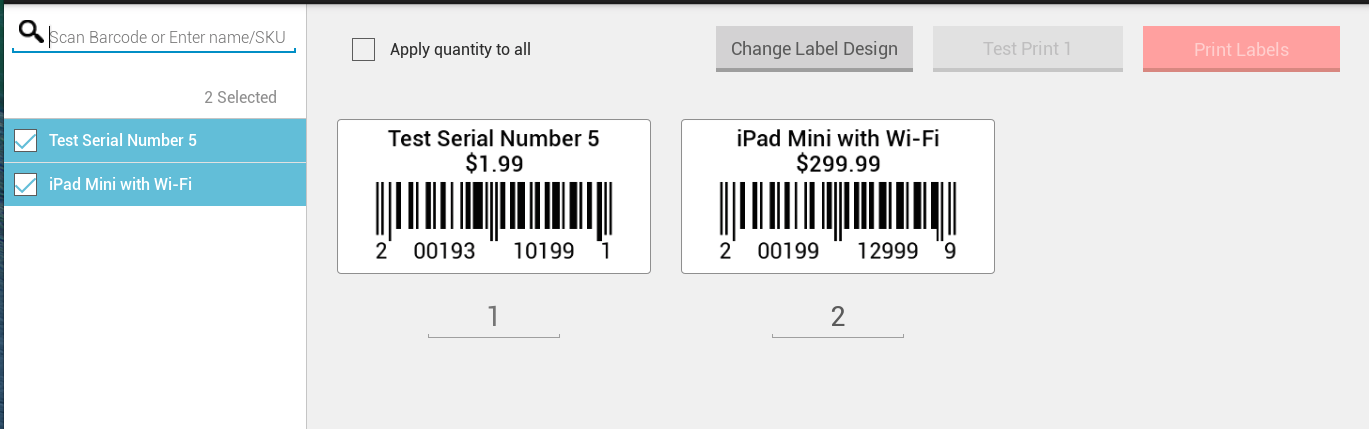
Label Printing
To use Easy Labels App to print bar code labels, select the "Print Labels" button on the Purchase Order page. This will print labels for all received items in the purchase order. These items will be selected along with their purchased quantity in Easy Labels; all you need to do is click the "Print" button.
Reports
This app provides 12 types of reports in CSV format for Admin users:
- Profitability report by day, week, month or range.
- Product Profitability report by day, week, month or range.
- Category Profitability report by day, week, month or range.
- Vendor Profitability report by day, week, month or range.
- Product Vendor Profitability report by day, week, month or range.
- Adjustments report by day, week, month or range.
- Purchase Order report for a period.
- Purchase Order Cost report by day or month.
- Current Inventory report.
- Current Inventory by Category report.
- Inventory tracking report by day, week, month or range.
- Inventory count on selected date.
Availability at Other Stores
When you have multiple stores using Clover and these stores are connected through Multi Store Reporting app, you can check the product availability at other stores on Clover device.
Just simply select the "Availability At Other Stores" tab on the Product's detail page. The app will display the on hand counts from other stores for the product. Products between stores are matched by product name.

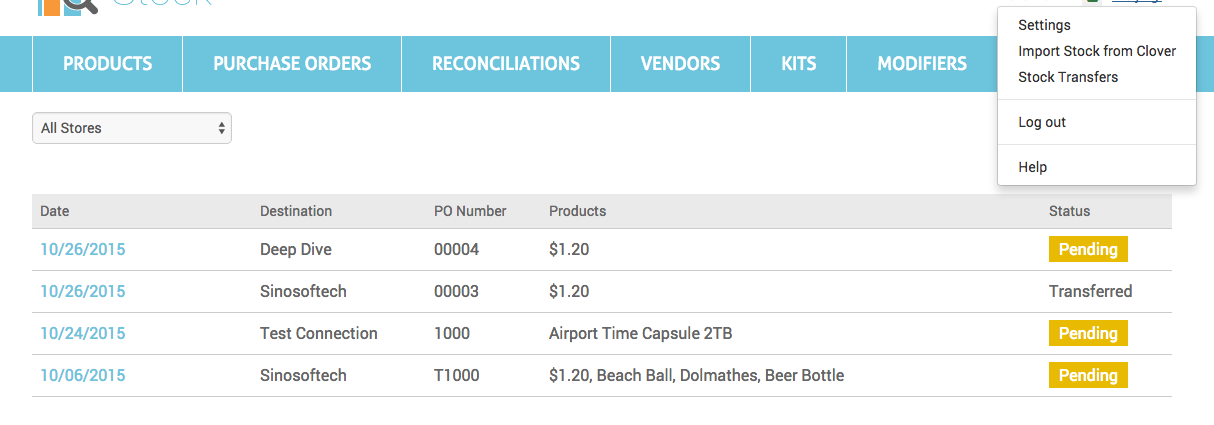
Transfer Stock to Other Store
When you have multiple stores using Clover and these stores are connected through Multi Store Reporting app, you can transfer products between stores using the Stock Transfer feature.
When products are transferred from Store A to Store B, the stock count for these products in Store A will be adjusted with the reason "Transferred out of the store." A new "on order" Purchase order will be added to Store B with these products. Then once Store B receives the products, they can simply mark the purchase order as received and move the products into stock.
You may also send a transfer request to another store with a list of products that you'd like to be transferred from the other store.